This is a guest post by DreamLab Studio, who kindly shared this information on our Discord Server. This is an expanded edition I thought would be great for everyone. Enjoy!
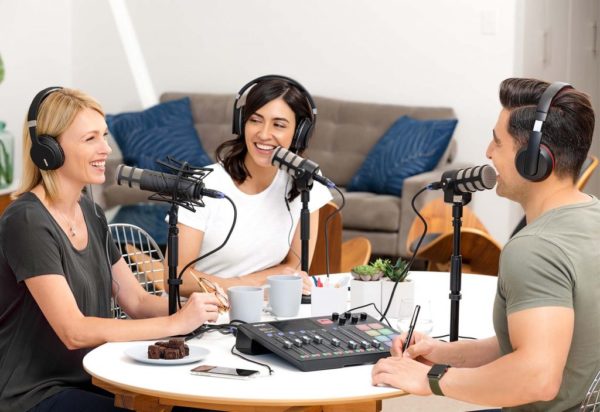
So you have decided you want to start creating your own content to share online. Perhaps you want to make YouTube videos, create a podcast, or maybe start live streaming. One problem you may run into is working with Audio. You may think it’s going to be the easiest thing to deal with, after all humans have been recording audio since 1877 thanks to Thomas Edison.
Unfortunately audio is something that can be pretty tricky to work with and more importantly viewers are willing to put up with poor quality video much more than they will with poor audio. As an example, check out this video from RainDanceCanada:
I’m not an audio expert but I have learned a bit over the years that I hope will help you record better quality audio and make the learning experience easier and more enjoyable.
I want to start off with some general things to consider about recording. The first big thing you can do to improve audio is record in a quiet area. Humans have the ability to filter out the background noise we live with all the time but Microphones just pick up sounds no matter how important they are. Things like the air conditioner, table fans, and the refrigerator can become very annoying background sound once recorded.
Turn off any non-essential sounds you can when you record. This includes your A/C unit if it’s too noisy. Recording in a room that has carpet, furniture, and curtains over windows can help reduce the noise and echo sound as well. Finally, try setting up your microphone so the source of any noise you can’t turn off, such as your computer, is as far away as possible and also behind the microphone where it’s less likely to be picked up.
1) Microphones
Try to avoid using a headset/mic combo, even the very expensive ones have very small microphones that give you a poor quality recording. It’s best to use a stand alone microphone that connects to your computer via USB or through an XLR cable going into an external sound card or mixer.
When looking for a microphone there are two main types you will most likely use. Dynamic and Condenser microphones.
Dynamic Mics
These mics are the type you usually see a singer holding when on stage, they keep the microphone close to their lips as they sing. They are also commonly used by DJ’s and podcasters as well. Their advantage is they are good at not picking up quieter background noises and that’s why you usually see people right on top of these mics as they use them.
The downside of these microphones is that since they are less sensitive you may need to use a preamp to boost the signal to get a clean recording. This depends a lot of the equipment being used but they are a good choice for reducing background noises, providing you don’t mind having to keep that microphone right in front of your mouth as you use it.
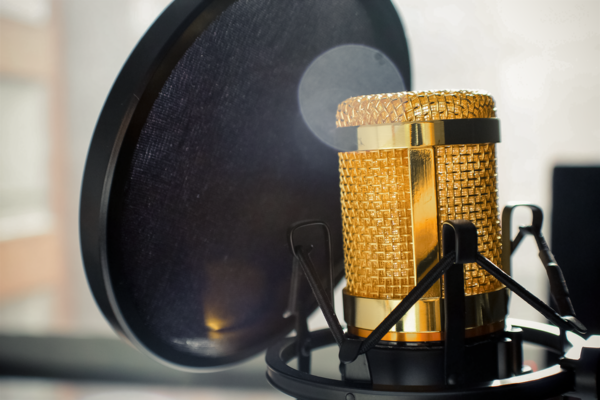
Condenser Mics
These mics are very popular, the Blue Yeti is a popular condenser microphone. These mics tend to be more sensitive so you can pick up more background noise but you get the benefit of not having to keep the microphone right in front of your face to use it.
If you aren’t using a USB condenser mic you will need to make sure the device you plug into can provide “phantom power” – a low level of power these microphones need to work correctly. Most sound devices will provide phantom power for these XLR connections.
2) Proximity Effect
Have you heard those DJ’s with the really low voice like Barry White? For the most part that’s caused by speaking very close to the microphone so the bass frequencies in your voice are more prominent. The down side of this effect is your voice can become a little “muddy” and it makes it harder to distinguish what’s being said.
You can avoid this some by using what’s called a “High Pass Filter” on your recording device. This is usually set at the 80 Hz range. Anything below that level gets filtered out as that’s mostly extremely low end rumble. Anything above that 80 Hz range will be allowed to pass through as audio and should be a bit clearer to understand.
3) Pop Filter
If you are using a dynamic microphone, or what to go for that Barry White low end, it’s best to use some type of pop filter. This will help block puffs of air when you speak words with plosive characters like the letter “p”. A strong puff of air on the microphone’s diaphragm can create a very strong sudden signal “POP” and distort the sound.
The pop filter is usually made of fabric, foam, or even metal and is placed between the speaker and the microphone. If you are using a condenser microphone and going to have it at least 10 inches from your face you do not really need a pop filter.
4) Compressors
Compressors may sound complicated if you aren’t familiar with them but they are basically a hardware device (or Software) that constantly adjusts your volume so it’s never too loud or too soft. This can give you a more even volume level and make everything easier to listen to.
You can use a physical compressor device between the microphone and the recording software such as OBS or just use one in the recording software. Here are some of the most common parameters you will see with compressors:

Ratio: This measures how much the volume level should be reduced when it crosses the threshold.
The ratio setting usually is displayed like “2:1” for a “two to one” ratio. This means for every 2 dB the volume goes over the threshold it will reduce the volume to 1dB above that threshold.
Basically this means it’s cutting the volume level in half for only the amount over the threshold. A volume that’s 8 dB over the threshold gets reduced to 4 dB over that threshold.
A 2:1 ratio is considered a very mild compression. A 5:1 ratio is medium and a 20:1 is very strong compression. For recording voice it’s best to stay in the 3:1 compression range so it still sounds natural.
Threshold: This is where you set the volume level where the compressor should take effect. Try starting around the -22 dB volume level.
Attack: This is how quickly the compressor response when the threshold is crossed. For voice you want a pretty quick response, try around 2 – 5 milliseconds.
Release This measures how long the compressor’s effect stays active once the volume is lowered. Try the 10 – 15 millisecond range.
Output Gain: This section may also be called “Gain” or “Makeup Gain” controls how loud the signal should be after it’s done being compressed. You can use this to raise the level of audio to a higher level now that it’s compressed to a more consistent volume.
5) Noise Gates
Basically a Noise Gate can be used to help try and lower background noise. Don’t get too excited, it’s not some magic wand device that will let you not have to worry about background sounds when recording but it can help.
You can set a volume level threshold that tells the noise gate when to block or lower the volume of the signal. As your voice should be the loudest signal coming in you want to set the threshold above the level of the background noise but below the level of your voice.
Depending on your device or software the Noise Gate may offer a few different settings but the most common are:
Threshold: The volume level when the noise gate opens up to let the audio signal through without being adjusted or muted.
Reduction: If your device/software has this it lets you specify how much to lower the level of that background noise signal. Even to be able to lower it 100% so it’s muted.
You can use a noise gate “live” as you record your signal or you can apply a noise gate to audio you’ve already recorded. To use it “live” first setup like you are about to record but don’t talk. Raise your noise gate’s threshold till you hear the background noise be affected. Don’t go any higher.
Now speak and make sure your regular voice is coming through fine without being affected by the noise gate. Using a compressor can make sure your voice stays at a more consistent volume level.
If you plan to record your audio first and then use a noise gate on it in editing I suggest recording 20-30 seconds of no talking, only the background noise. Many audio programs let you take a sample of audio to build a noise profile, then it can use that on your entire clip to help cut down on that noise level.
Finally, keep in mind that a noise gate only works when you aren’t speaking. When you talk the gate will open and your voice will be heard but so will the background noise. A loud background noise may still be obvious while you are speaking, this is why a quiet environment is important.
It’s one thing for a voice to come in and out as that’s just normal speaking patterns we are used to but if you clearly hear something like a fan do the same thing (when a person speaks) it’s extremely distracting.
6) Equalization
Finally you can use a little bit of EQ to help make your voice more understandable and pleasing to listen to. The first thing you can do is try moving the microphone around a little as this can greatly change the tone of your voice at times.
I’m a guitarist and when you set a microphone in front of a guitar speaker even adjusting it an inch can really change the tone that’s being received. If you are speaking closely into a microphone just speaking slightly to the side or not is worth trying out.
I guess this is a good place to mention to read your microphone’s instructions on where it’s polar patterns are positioned. Polar patterns are the area around your microphone that pick up sound. Some microphones should be spoken into the top of, some on the sides. Some are designed to accept audio from a wide area around the microphone.
Some microphones will even let you change to different types of polar patterns. Check the manual for your mic to be sure you are using the mic correctly. There are a lot of examples of people talking into their microphones in the wrong way on YouTube.
It’s also important to realize everybody’s voice is different so these EQ settings I’m going to cover are generalities, be sure to try variations in these EQ ranges to see what sounds best for you.
When making EQ adjustments be subtle with them. Try to keep the adjustment to around 3-5 dB adjustments at the most.
- Male voices tend to be in the 80 – 180 Hz range.
- Female voices tend to be in the 160 – 250 Hz range.
Some other things to try which can help your spoken audio some:
- Make sure to add a High Pass (Hi Pass) filter to clear out that almost useless low end rumble on the voice. Try setting 80 Hz for men and 100 Hz for women.
- Try cutting a little in the 100-300 Hz range to add some clarity to the voice.
- If the voice is a little too “muddy” sounding and unclear try reducing a little in the 300-400 Hz range.
- Boosting a little in the 2000 – 6000 (2-6 kHz) range can help add some clarity and sparkle to some voices.
- Be careful of boosting too much in the sibilant range which is around 3-5 kHz. Remember “sizzle sound from sibilance sucks!”

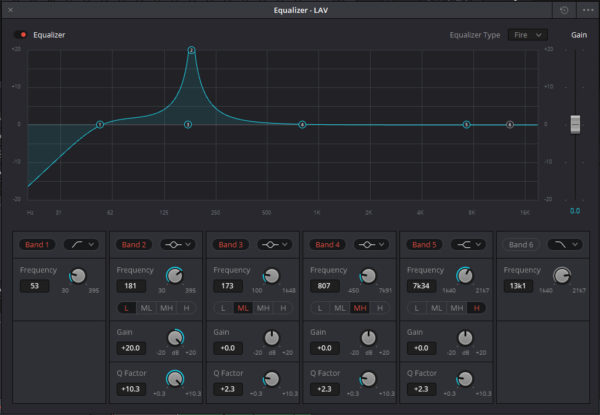
Depending on your EQ device/program you may also have different types of adjustments where some curves are slow arching curves, others provide more sharp accurate adjustments. In the screenshot below from DaVinci Resolve you can see next to the “Band 1” “Band 2” in red are different types of curves you can select for each band:
I think the toughest thing is trying to get a quiet room to record audio in. That would make everything much easier! I hope this information will be helpful!
I think there are 2 main things that make working with audio difficult for people. One is getting a quiet recording environment. A quiet recording environment means you should have less issues to correct or prevent when recording.
The other is balancing the settings on your equipment as the signal passes from the microphone through the preamp, compressor, noise gate, and then finally your recording. Adjustments in one affect the others so it becomes a bit of a balancing act.
I hope this will help you improve the audio quality in your content and not be afraid to play around and test to see what works best for your setup.
Thanks.