Somewhat lengthy story coming up, so please bear with me here. The actual setup procedure is described further down in this article (for TLDR readers).
So I’ve upgraded my Logitech multi-device keyboard and mouse recently. I’ve been using my old MX Craft keyboard and MX Master 3 mouse on both a PC and Mac, switching from one to the other, and occasionally a third Linux machine. This worked well, and had it not been for Logitech not supporting the Craft on their latest Options+ software, I wouldn’t have upgraded (that and also I was toying with the idea of a second desk setup, which has been pushed back a bit or isn’t happening).
Either way, I found myself with a brand new Logitech MX Keys and MX Master 3s for Mac on my hands (in silver/white) and I have to say I love them both. Particularly the mouse has been improved and features soft clicks now, rather than the regular sharp somewhat noisy click sounds the MX Master 3 makes. Both are great mice, but the 3s is a fantastic improvement.
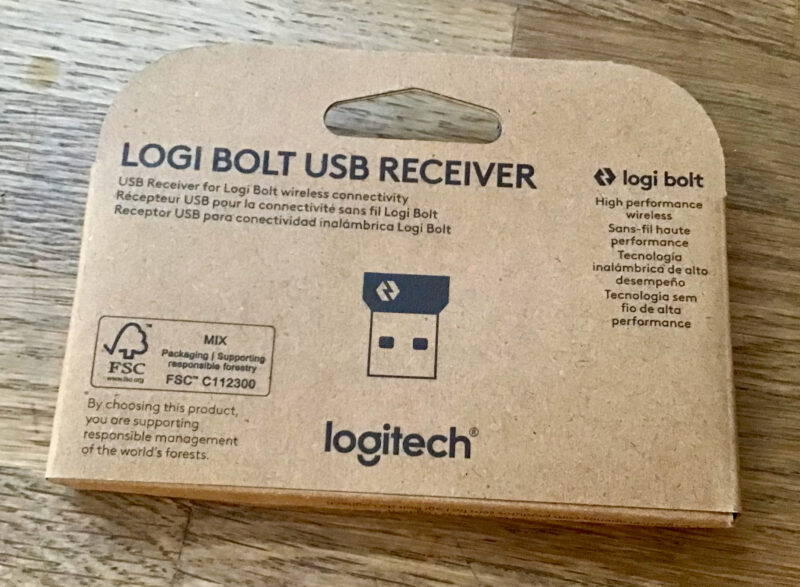
Hardware wise, the MX Keys came with a Unifying receiver while the mouse came with a Bolt receiver. Those technologies are incompatible, with Bolt being the newer more reliable version promising less dropouts and a wider range than Unifying. Hence I had to decide which receiver to use, and decided on Bolt. I could insert it to my PC and use the Bluetooth connection on my Mac to get started, however if you’ve used Bluetooth with basically anything since the nineties you know that it can suck so very very much at everything you use it for.
While my setup worked in principle, I noticed that switching to the Mac (either via Flow or via the dedicated quick button on the keyboard) took a few seconds, which is annoying when you do it often enough. So I thought, perhaps a second separate Bolt receiver could hold the answer to my problems and make that device switch a bit swifter. I ordered one for $15 and wanted to install it… however with Options+ it isn’t all that obvious on how this was supposed to work.
See, with the older Options (non-plus) software, you needed a separate piece of software to pair devices to other Unifying receivers. Then they’ve changed it so that we could do it via some browser plugin, and now with Bolt and Options+ things have changed again of course. And here’s where out actual “how to” begins.
Pairing a new Bolt Receiver with Options+
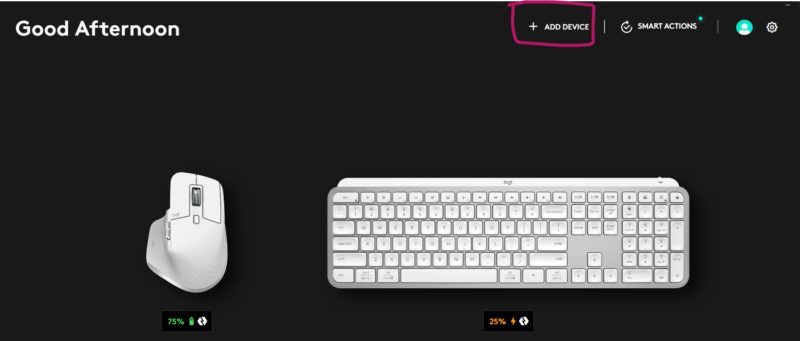
Open Logitech Options+ and see this welcome screen. In my case, both devices were already connected (slot 1 for the Mac, slot 2 for the PC, and slot 3 was spare and my plan was to add the connection to the new Bolt receiver here). It’s actually rather simple: insert the Bolt receiver, then click on Add Device.
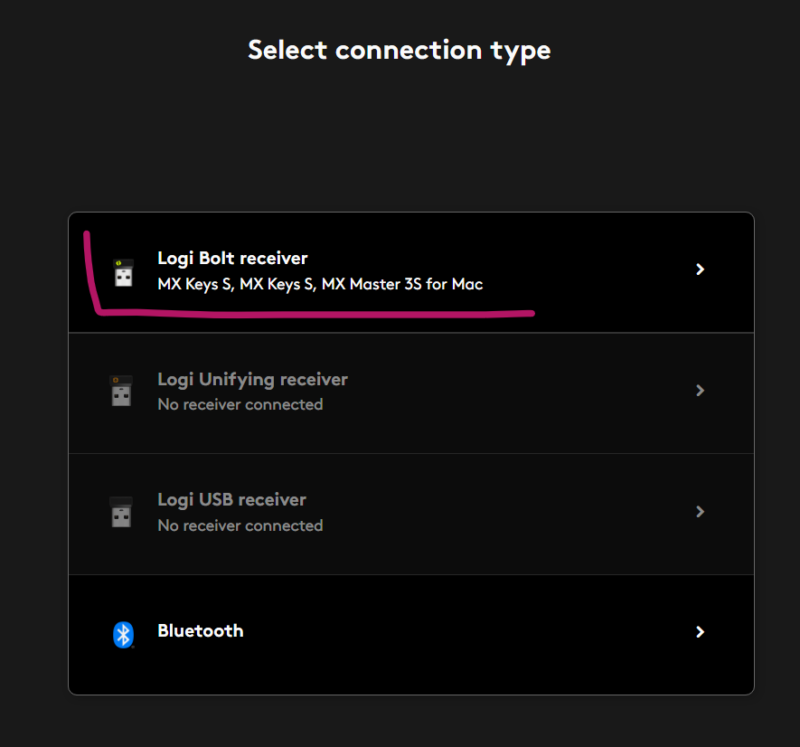
We now get a choice where we want to connect what. Thankfully the new devices seem to all be backwards compatible with the Unifying receivers of which I have plenty, as well as Bluetooth and also dedicated USB receivers. Those are the hard-coded ones that come pre-paired with a device I assume.
In my case, I selected the Bolt option (obviously pick the type of connection you want to make instead).
Pairing your Mouse
On the mouse, it’s fairly easy to switch to the appropriate slot to connect with the button on the underside of the device. I’ve switched mine to 3 and it started blinking rapidly, indicating it was now in pairing mode. Follow the prompts carefully as it will verify the device by way of asking you to click a sequence of left and right with the top buttons.
Take your time over this and wait until the software prompts you for the next click, don’t rush this or you’ll easily fail. It’s sort of like a patience game. Be mindful that as the last step in the sequence will ask for a left and right click together. I must have failed this at least twice until I realised this. Eventually your mouse will be paired and you can move on to the keyboard.
Pairing your Keyboard
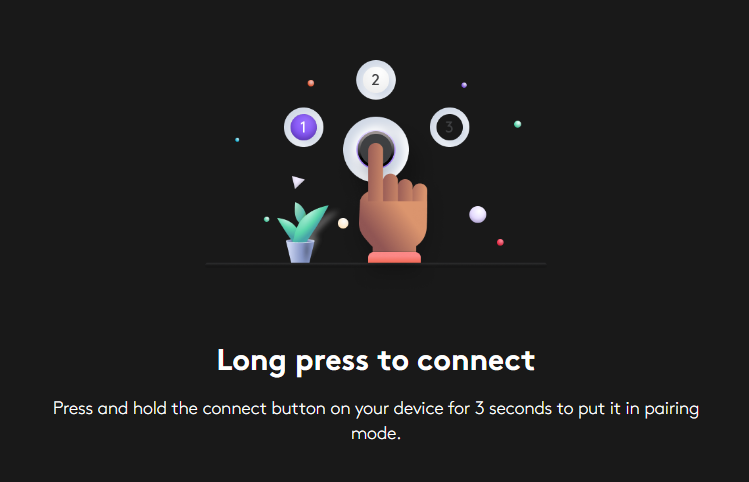
Now came the bit I had sort of found out by accident earlier already, but again it’s relatively un-obvious on how to switch the keyboard to the new slot. When you press the free slot, all it does it flash briefly, detect nothing and switch back to the previous slot. The trick is to long press the slot for several seconds until it remains on to go into pairing mode. Had I followed the prompts (which I didn’t know existed at the time) I would have known that!
Once again Options+ will verify the device by asking you to type a number code, followed by the enter key. It’ll take a few seconds to finalise the pairing.
Enabling Flow to switch between computers
That’s both devices paired, but Options+ doesn’t yet know if and how you’d like to switch from one computer to another. If that’s your plan, read on. I’ve been using this system for years and it works quite well. I have a PC with two screens on the left, and a Mac with one screen on the right. Moving between them is made possible with something Logitech calls Flow.
You can always switch manually from one device to another, but if you use two computers simultaneously like I do, Flow will come in handy. It works by enabling it on the mouse, then having your keyboard follow what the mouse does. Both computers need to be on the same network for this magic to work.
On the front screen that shows your devices, select your mouse and navigate to Flow. Enable it at the top right.
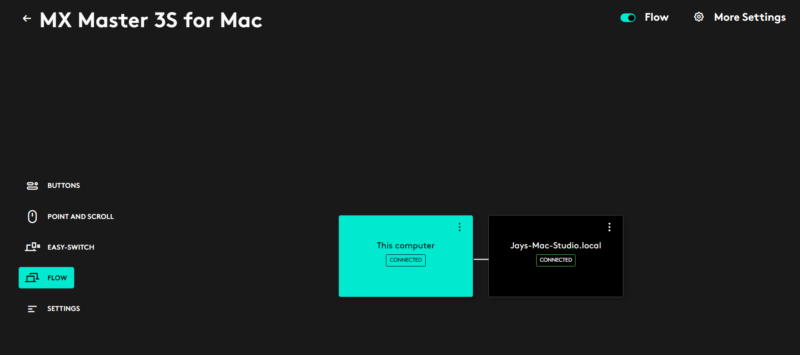
Options+ will look for other computers on the network and (hopefully) find your other device. When it’s done, move the computer to the correct spot to that it will know when to switch (this works much like arranging multiple displays).
By default, when you move your mouse over to the other screen, it will immediately switch over but doesn’t take the keyboard with it. To enable that, click on More Settings (top right) and pick your keyboard under “Link Keyboard”. Note that the top-end Craft from yesteryear isn’t supported in Options+ and likely never will be (how else would they sell new devices).
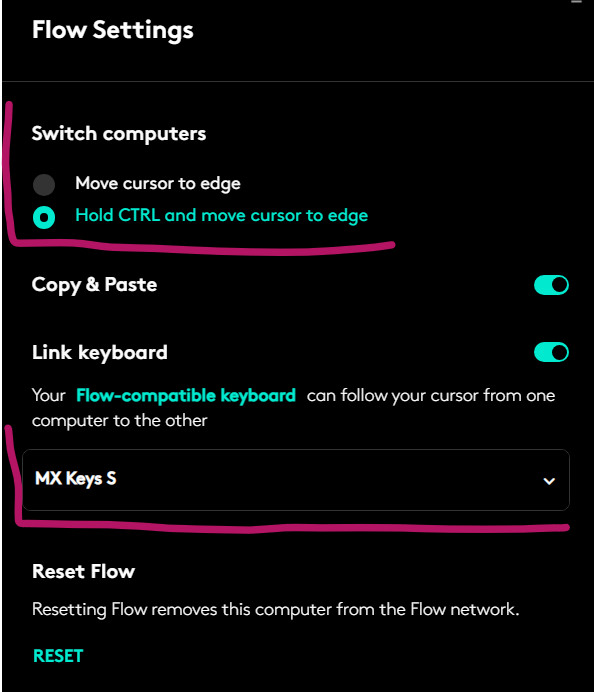
I must admit that I like a little more control over when my mouse switches, so I use the “hold CTRL” option, which means that my mouse/keyboard doesn’t accidentally fly off while I’m in the middle of navigating a tricky 3D application.
Using Copy/Paste between devices
In the above dialogue, there’s also an option to copy and paste data between devices. It works OKish most of the time, but I had to curb my expectations a bit for daily use. It’s definitely not as fast as copy/paste on the same machine and the data takes a moment to travel over the network and get recognised by the daemon on the other system.
For simple text data, it works reasonably well – more so when you use the right-click option to do either. The keyboard shortcuts with CTRL and CMD work most of them time, but not always.
Binary data like clipboard images also work, but do take longer to arrive. Note that on the Mac, image data can’t be pasted when copied via the screenshot tool on PC. Instead, you have to right-click on your Desktop or in a Finder window and paste there, which will save the image at that location (and then you can use it). This isn’t a problem when going from Mac to PC.
Regular files can also be copied (Windows Explorer to Finder and vice versa), but beware of the relatively slow transfer speed. I didn’t encounter any file size limitations, so even larger video files will eventually make it, but my network speed is way faster than what the daemon is able to put through in comparison.
Is Bolt faster than Bluetooth
Now that I have my Mac connected on slot 1 via Bluetooth and on slot 3 via Bolt, I can tell you that switching between devices with a dedicated receiver is WAY FASTER than waiting for crummy old Bluetooth to make the switch. So yes, it was definitely worth it.
Was it really necessary to invest into another Bolt receiver or could the included Unifying receiver have done the same job? I don’t know. I didn’t even know Unifying could be used alongside Bolt and only found this out after ordering it, so if anything I may have saved you (and my future self) a few bucks/quid.
Overall I’m super happy with my new setup, even more so now that I can switch a little faster between computers. Thanks for reading, and happy computing!
Further Reading/Shopping
- Logitech Master MX3s for Mac (and PC obviously): https://amzn.to/3HJYzBg
- Logitech MX Keys (silver/white): https://amzn.to/3HIyEcY
- Logitech Bolt Receiver: https://amzn.to/481cT2W