Networking sucks, particularly when Windows is involved. I’m not actually sure why, but I guess it has to do with the fact that deep down, manufacturers and software developer really don’t want us to connect arbitrary devices to suit our needs. It’s just a fact of technological survival I guess.
I’ve recently re-installed Windows on my desktop, and now my Mac cannot connect to Windows anymore. I had to set this up again from scratch. While I remember how to do it, here’s how it (once) worked for me:
On Your Windows PC
Make sure File Sharing is enabled. It isn’t by default. To make it happen, search for sharing in the whatchamacallit box at the bottom left. Pick Manage Advanced Sharing Settings.
This will bring up a handy dialogue box, in which you can enable file and printer sharing. Without this, nobody is allowed to even think about connecting to your Windows machine.
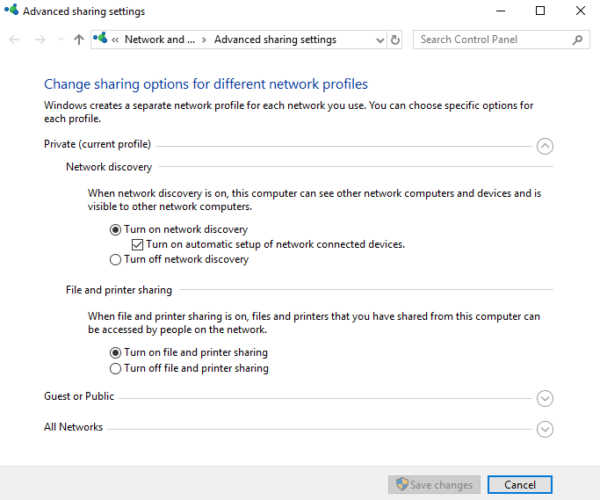
Click Save Changes. That may be enough to enable your new settings. Sometimes you may have to wait a bit. Other times, you may have to restart both your Mac and your PC for this to work. And on rare occasions, you may have to buy a new computer. It entirely depends on luck or other factors. There’s literally no rhyme or reason to this.
Sharing Drives, Files and Folders
With your PC ready receive incoming connections, we need to tell it explicitly which files or folders can be shared. If you don’t do this, you’ll end up with a valid connection, but no visible folders to traverse. Sharing items can be done from the Windows Explorer: right-click on a location, choose Sharing and hit the Share button. This will let you define a list of people who this location can be shared with.
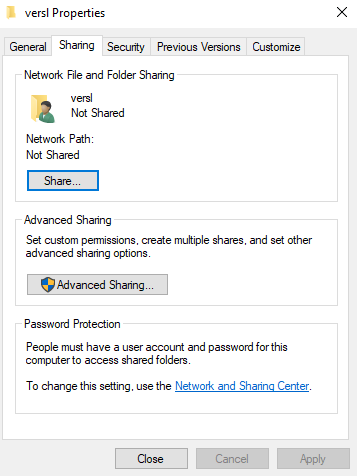
For safety and security, I recommend to choose yourself from the list, so only you will have access to your own files. You can even create a new user just for shared files. For absolute convenience, I recommend sharing either a whole drive (that’s not possible with the system drive though), or your entire home directory. That way, anything that’s saved in your Windows Library Folders or external hard drives will be accessible from your Mac.
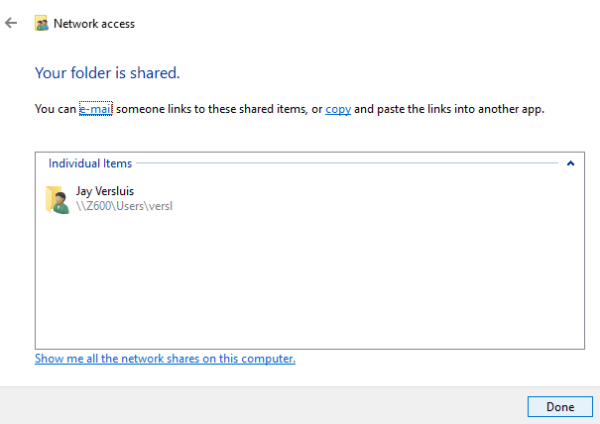
It will take Windows a few moments to apply your sharing settings. Eventually you’ll see a screen much like this:
Finding your Windows IP Address
The final thing we need to find out is our Windows IP address, so that we can connect to it from our Mac. To do this, open a command prompt and type ipconfig. You’ll get some details about your current network connection. Pay attention to the IP that’s connected, under IPv4:

In my my case, that’s 10.0.1.85 – at least today it is. A computer restart, or a router restart may change this. To avoid such hassle, you can setup a static IP address – but I’ll leave this adventure for another time. For now, let’s make a note of that IP and head over to the Mac.
On Your Mac
Connecting your Mac is actually pretty simple: in Finder, hit CMD + K to bring up a box that lets you connect to any server (local or remote) with a protocol and an IP address. You can do the same by heading over to Go – Connect To Server. Think of the protocol as the language both systems have to speak to exchange data. One such protocol that’s supported on both macOS and Windows is the Samba protocol.
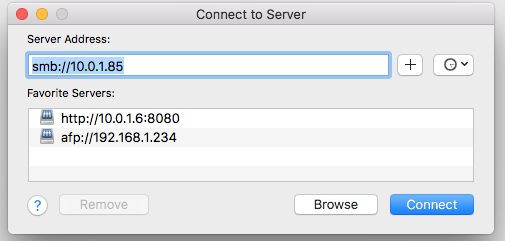
In the box that comes up, type smb:// followed by your IP address (in my case, that’s smb://10.0.1.85). In computer terms, this means “speak to the following IP address, using the Samba protocol”.
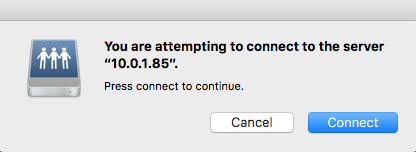
After your Mac is hard at work trying to speak to Windows for a few moments, you may get incredibly lucky and end up with a login window, asking you to provide user credentials for the Windows PC.
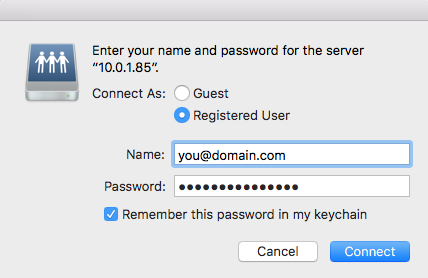
Choose Registered User, and login as you would on Windows, either with a local user/password combination, or a Microsoft account. If you tick the “Remember this password” option, macOS can log you in automatically in the future. Now your Windows system comes up as a regular drive in Finder, and you can explore it just like it was a network drive. Feel free to drag and drop files in or out, regardless of the file system is.
Note that although you’re now connected, you CANNOT do this from the Windows side – only from your Mac. It’s a “feature”.
What if this doesn’t work…?
The above method of connecting Windows and Mac works in about 4% of all cases. Sometimes. Depending on unknown factors beyond human understanding. If you’re lucky enough that it has indeed worked for you, go celebrate. You deserve it!
Most of us on the other hand may end up with a dialogue box much like this one:
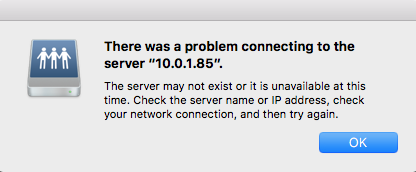
What your Mac is trying to say here is that it is aware of an issue, but it’s not clever enough to tell you what it is. Could be literally anything: wrong mysterious setting somewhere, typo in your credentials, wrong day of the week, that sort of thing. We’re being kept deliberately guessing, because that’s what makes playing with computers so much “fun”.
Sometimes you may encounter your Mac being seemingly stuck on a little window, trying to connect to Windows for about 20 minutes or so, without ever being successful. The only thing that I can suggest in such cases is:
- restart your Mac
- restart your Windows PC
- restart your router
- shutdown all the above, then start them one at a time
- repeat the steps to verify your IP address
It goes without saying that all machines need to be on the same network for this to work in principle. Make sure neither computer is accidentally logged in to your phone’s WiFi hotspot or your neighbour’s network. Just thought I’d mention it.
If all else fails (which I’m sure it will), a more drastic measure might be necessary. They have really cheap USB sticks these days, some are bigger than hard drives. Get one of those, and forget about networking two different systems. It’s like trying to make your goldfish speak.
Because sometimes, it just doesn’t work.