I have a lot of RAM in my system and wanted to see if there’s a performance improvement to be had by disabling the page file. By default this is enabled so that Windows apps never run out of memory, but if you’re sure you have plenty, there’s no need for Windows to write a swap file to the hard drive (which of course it does anyway).
Here’s how to disable this feature in Windows 11. The process is the same in WIndows 10, although you may see different options than shown in the screenshots.
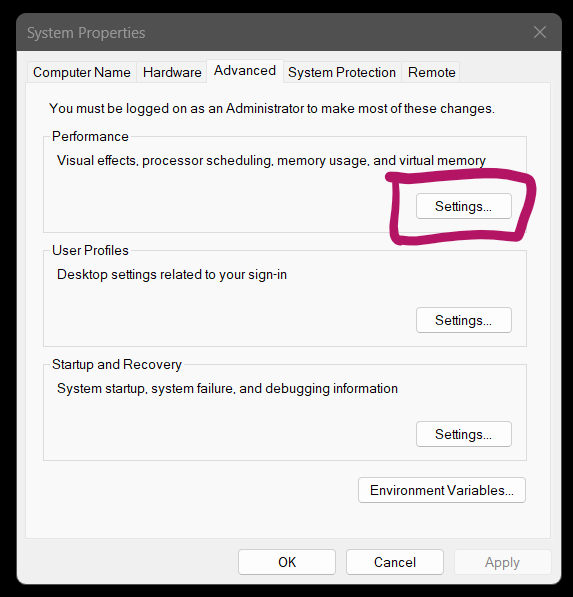
Search for SystemPropertiesAdvanced, then choose Settings under Performance.
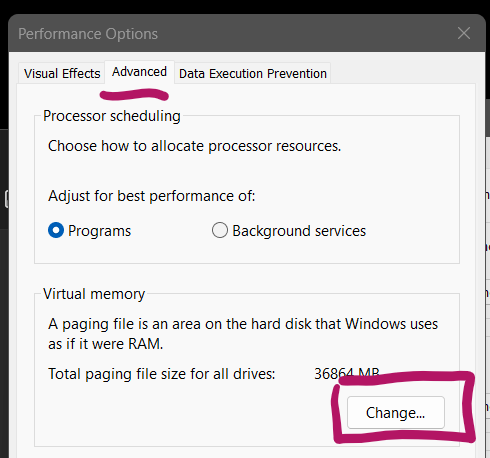
Under the Advanced tab, find the Virtual Memory section and select “change”. I can see here that Windows is currently using 36GB file and I’d rather it didn’t do that.
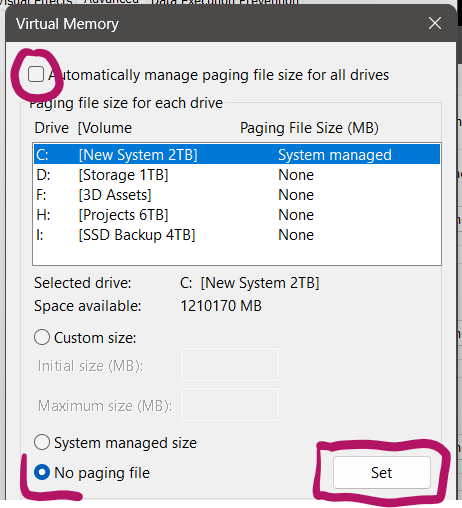
By default this next section will be set to “automatically manage paging file”, which greys out all options on this page. Disable the tick box, then choose “no paging file” and click Set.
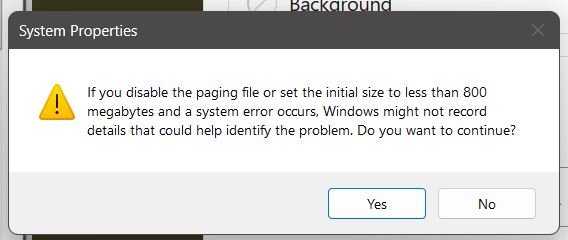
Windows is going to tell you that issues may occur, but since we’re seasoned IT pros that like living on the edge, we’ll say “yes” with confidence.
Click Apply and OK to all the previously opened windows and restart your system. Next time you boot up, those previously created page files should be 0 in size (although they may still be there, don’t delete them).
Use Task Manager to keep an eye on your memory usage, and feel free to set the page file back to automatic if this isn’t working for you. Good luck!