 I’ve just installed the Dovecot Mail Service on one of my Plesk 12 servers. It’s an alternative to the old favourite Courier IMAP/POP and a new addition in Plesk 12.
Dovecot does more or less the same as Courier (i.e. lets you receive mail), but it’s a bit more configurable and debug friendly. It also offers server-side mail filtering which is accessible via the Plesk Webmail services Roundcube and Horde.
In this article I’ll show you how to install Dovecot in Plesk 12, and how to add your own SSL certificates for mail. In my previous article I’ve explained how to do this with the standard Courier Mail service.
Installing Dovecot in Plesk 12
Head over to
- Tools and Settings (or the Server Tab)
- under the Plesk heading
- Updates and Upgrades
Select Add or Remove Components and under Mail Hosting Features, find the option for Different IMAP/POP3 server:
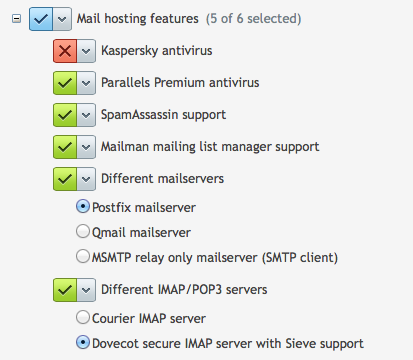
You can only install either Courier or Dovecot. Switching will automatically uninstall the component you currently have and instead install the other one.
Note that switching Courier for Dovecot will preserve all mailboxes and will not affect your outgoing mail services. Give Plesk a moment until your see the “installation has finished” message.
You’re now running Dovecot!
Patching Dovecot SSL Certificates
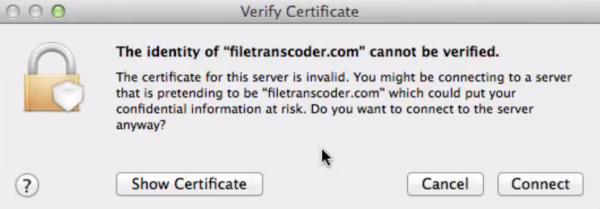
As with Courier, Dovecot will use self-signed certificates for secure connections. This means that a nasty window is likely to pop up when clients connect. You can suppress this window by specifying your own SSL Certificates.
The default configuration file for Dovecot is in /etc/dovecot/dovecot.conf. However the file states that any changes you make here are wiped when an upgrade comes along. Instead, take a look at the /etc/dovecot/conf.d/ directory in which you’ll find three files by default:
- 10-plesk-security.conf
- 15-plesk-auth.conf
- 90-plesk-sieve.conf
You can add your own configuration snippets here, each beginning with a number and ending with .conf. The lower the number, the earlier your snippet is loaded. The higher the number, the later it is loaded. You get the picture.
Let’s create /etc/dovecot/conf.d/5-ssl.conf for our purposes. Because I had already configured my certificates for Courier they are still in /usr/share/imapd.pem – but feel free to place your .pem files anywhere you like. Here’s what my file looks like:
# SSL Certificates for Dovecot are defined here

ssl = yes
# Path to your Certificate, preferred permissions: root:root 0444
ssl_cert = </usr/share/imapd.pem
# Path to your Private Key, preferred permissions: root:root 0400
ssl_key = </usr/share/imapd.pem
Dovecot lets you have separate files for the certificate and the private key, something that’s not possible in Courier as far as I know. Dovecot is also happy to keep those in the same file though as in my example, and as in Courier. Easy going I say!
For the changes to take effect we need to restart the Plesk Mail Service like so:
/usr/local/psa/admin/sbin/mailmng --restart-service
That’s it!
How do I add a certificate for outgoing mail?
Postfix (and QMail) deal with sending mail, Dovecot and Courier only deal with receiving it. I’ve described how to add SSL Certificates to Postfix in my article about Courer.
Further Reading
- Nikolay explains how to use server-side filtering with Horde and Roundcube on the Plesk Dev Blog: http://devblog.plesk.com/2013/11/dovecot-in-plesk-for-linux-11-6/
- More Details on Dovecot SSL Configuration: http://wiki2.dovecot.org/SSL/DovecotConfiguration
- Official Dovecot Documentation: http://wiki2.dovecot.org/FrontPage
- Wikipedia on Dovecot: https://en.wikipedia.org/wiki/Dovecot_(software)
- Check your new mail server with this handy online tool: http://www.checktls.com/perl/TestReceiver.pl