I love version control, and I really like Github for Desktop. One thing I wish it had was the ability to place an existing folder under version control, but alas it’s not to be. We can create new repositories in empty folders, we can check out projects that are stored elsewhere, but GitHub for Desktop refuses to create repositories in folders that already have data in them.
Granted, there are messy workarounds: you could simply create a new empty folder with version control, then paste all your existing data into it. That might upset the project application though, as all paths will change. Or you could copy all your existing data to a temporary folder, delete your original, then re-create it with exactly the same folder name, put it under version control and paste everything back. It’s all messy though!
Thankfully there’s an easier way to make this happen by using the Windows command line (gasp). Don’t worry though, I’ll walk you through the whole process. You’ll be flying around this thing in no time! I’m doing this on Windows 10, so we need a few prerequisites that I thought I’d mention:
- Git for Windows needs to be installed. It’s the command line tool that lets us administer and create repositories. Get it from here: https://git-scm.com/ (accept all default paths during the installation)
- GitHub for Desktop should to be installed. That’s the desktop client that allows for easy repo management. I’m assuming you have it, but just in case you don’t, grab it from here: https://desktop.github.com/
- You may also want to install a Code Editor, just in case you need it. I’m mentioning this as the Git installation will ask for something in case you need to change files when you’re on the command line. There are many to choose from, I prefer Visual Studio Code – but this step is entirely optional
This guide is for Windows 10. Windows 11 will be very similar, macOS and Linux will differ. Let’s begin!
Opening the Command Prompt
Head over to the Windows search bar at the bottom left and type in CMD. Click on Command Prompt.
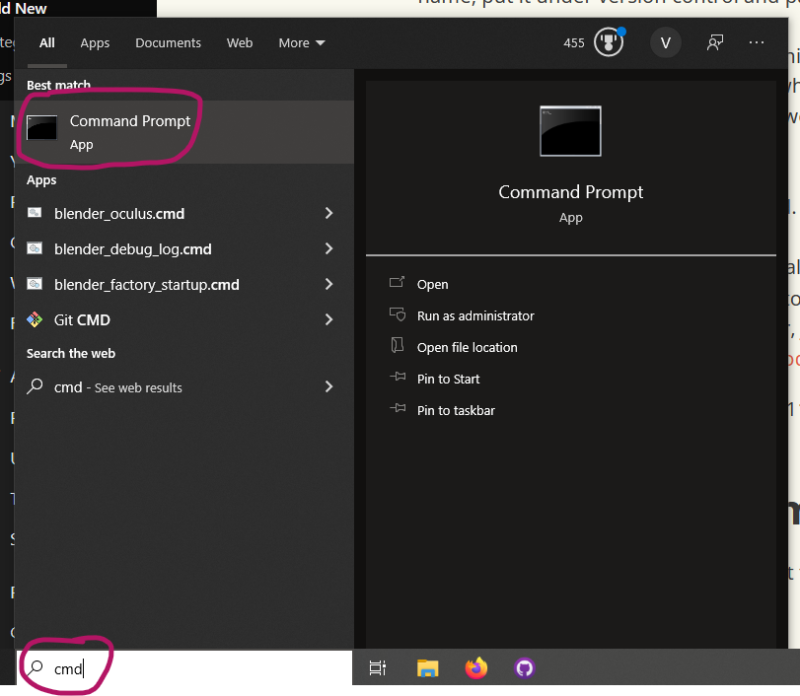
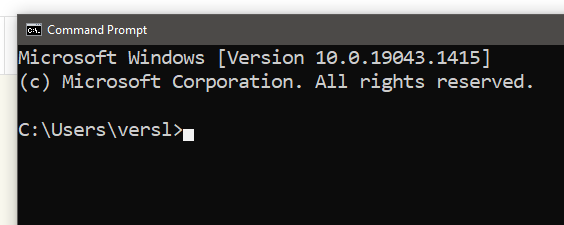
This will open a somewhat scary hacker window. Leave it open for now and don’t type anything unless you know what you’re doing 
Navigating to your project folder
This next step is a little unfriendly in Window. We need to type a command that gets us to the folder you’d like to place under version control. The cd command will do this, but it will require a text string that points to the exact location on your hard drive.
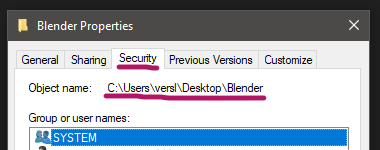
The simplest way to get this is by opening a Windows Explorer, finding your folder, then right-clicking on it. Choose Properties, and on the Security Tab you’ll see the full path under Object name. Highlight that whole line (including the drive letter) and right-click to copy it. In my case, I have a folder on my Desktop called Blender with a bunch of files in it. Here’s what my path looks like:
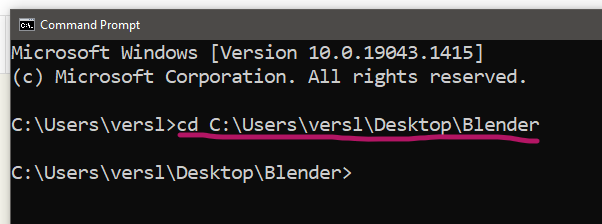
With this line copied, head over to your open Command Prompt hacker window and type “cd”, then paste your path and hit return. You can paste into the command line by right-clicking on the top bar of the window (Edit – Paste. Shortcuts like CTRL+V won’t work reliably here. You may end up with a spurious character at the beginning of the line, use the cursor keys to navigate there and get rid of it.
When you’re done it should look something like this:
Placing our folder under Git version control
Let’s do some Git magic next. You invoke Git simply by typing “git” without any parameters. If you’re curious, try it out and read what it tells you. To use Git we type “git ” followed by a command. In our case we need to do three things:
- create a new empty Git repository
- add all existing files to this new repository
- make a commit to save our changes
Here’s how we do that:
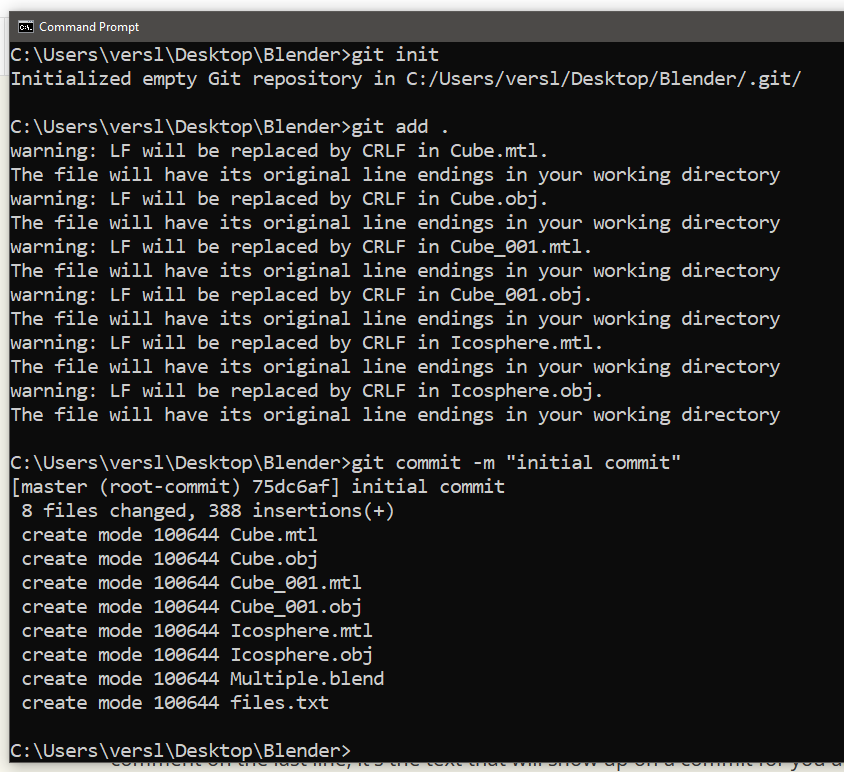
git init
git add .
git commit -m "initial commit - how exciting"
Type all these lines into the command prompt one by one. Feel free to vary the comment on the last line, it’s the text that will show up for you and contributors as a reminder of what this commit was all about. You may receive some output that differs from mine (I had some 3D objects in there that generated notifications). If all goes well, Git should report how many files have been changed and where they’ve been committed to (usually the master branch).
Feel free to close the command prompt window, we’re done with it.
Adding your new repository to GitHub for Desktop
While skilled hackers will be comfortable making future commits in the same way as we did on the last line of our command prompt window above, most of us may need the convenience of a Desktop client going forward. That’s where GitHub for Desktop comes in. All we need to tell it is where our new repository is and it’ll be able to manage it for us.
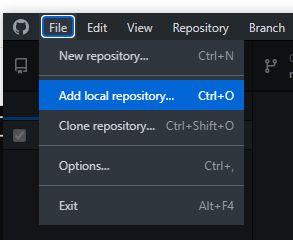
To do that, head over to File – Add Local Repository and navigate to the same folder as above. In my case it was the Blender folder on my Desktop. If you have hidden files enabled, you’ll notice a hidden folder called “.git” in there. That’s our clue that this folder is indeed under version control. Git keeps all kinds of exciting stuff in there (thankfully we don’t ever need to look inside it).
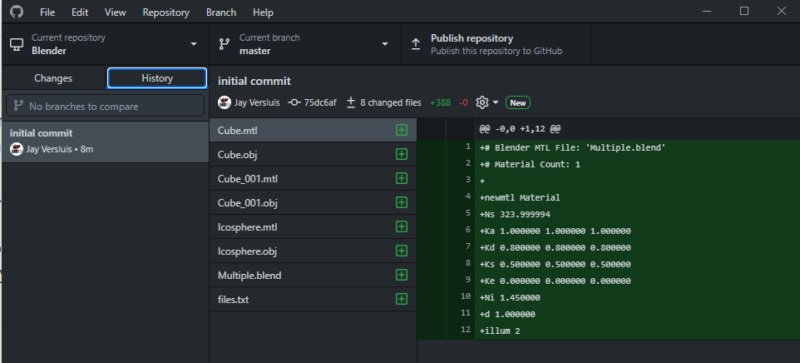
Once added, you should see no local changes. They will appear here though as you start saving over files, adding new ones and deleting existing ones. Switch over to the History tab to see all your existing files and your commit message you typed in on the command line.
Congrats if you’ve made it this far! You’ve successfully added a local folder with existing files to GitHub for Desktop and placed an existing project under Git version control. You’re now ready to make branches, publish your code to GitHub and collaborate with others. Have fun!