 I was pulling my hair out the other day trying to connect to a VM in Parallels Desktop. It’s fairly straightforward, yet rather complex at the same time. Here’s how to do it step by step.
In this example I’m running Parallels Desktop 8 under Mac OS X 10.9 Mavericks, and my Guest OS CentOS 6.5.
Configuring your VM
Before starting the VM, start Parallels Desktop and head over to
- Virtual Machine
- Configure
- Hardware
- Network
You’ll get to a screen like this:
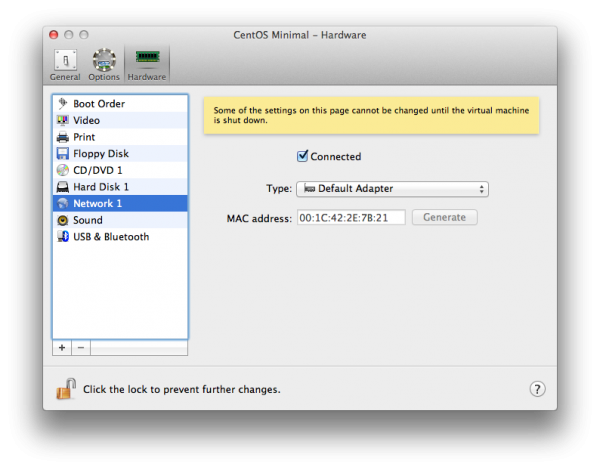
Make sure the tick box is “Connected”. Under Type you get a drop-down menu with three options:
- Shared Network: gives your VM access to your internet/network connection, much like a “split”
- Bridged Network (with several options): creates a new IP address for your VM and attaches it to whichever device you choose. Stick to the “Default Adapter” here unless you know what you’re doing. This will let other devices on your network connect to the VM.
- Host-Only Network: also creates a new IP address for your VM, but only lets your Mac connect to the instance. Other devices on the network won’t be able to connect (more secure).
Pick Bridged (Default Adapter) or Host-Only, then start your VM.
Configuring CentOS
We need to find out which IP our instance has. The easiest way to do this is to run ifconfig:
ifconfig

eth0      Link encap:Ethernet  HWaddr 00:1C:42:2E:7B:21
          inet addr:10.0.1.31  Bcast:10.0.1.255  Mask:255.255.255.0
          inet6 addr: fe80::21c:42ff:fe2e:7b21/64 Scope:Link
          UP BROADCAST RUNNING MULTICAST  MTU:1500  Metric:1
          RX packets:1608 errors:0 dropped:0 overruns:0 frame:0
          TX packets:83 errors:0 dropped:0 overruns:0 carrier:0
          collisions:0 txqueuelen:1000
          RX bytes:283880 (277.2 KiB)  TX bytes:12474 (12.1 KiB)

lo        Link encap:Local Loopback
          inet addr:127.0.0.1  Mask:255.0.0.0
          inet6 addr: ::1/128 Scope:Host
          UP LOOPBACK RUNNING  MTU:16436  Metric:1
          RX packets:0 errors:0 dropped:0 overruns:0 frame:0
          TX packets:0 errors:0 dropped:0 overruns:0 carrier:0
          collisions:0 txqueuelen:0
          RX bytes:0 (0.0 b)  TX bytes:0 (0.0 b)
The second line of the output holds our answer: “inet addr: 10.x.x.x”. Make a note of this address, you’ll be connecting to your VM via this IP.
Next we need to make sure that the SSH demon allows outside root connections. You do this by hacking the following file:
/etc/ssh/sshd_config
Make sure the following two options are commented out (i.e. do not have a # in front of them):
PermitRootLogin yes
PasswordAuthentication yes
If you had to un-comment either line, make sure you restart the SSH demon:
service sshd restart
Login to your instance via SSH
If all went well you should now be able to open a Terminal window on your Mac (or any machine on the same network if you’ve selected the “Brided” option in Parallels Desktop) like so:
ssh root@10.2.3.4
Obviously, replace 10.2.3.4 with your own IP address.
Watch the screencast
If this video looks a bit ropy you can always watch it directly on YouTube in glorious HD.